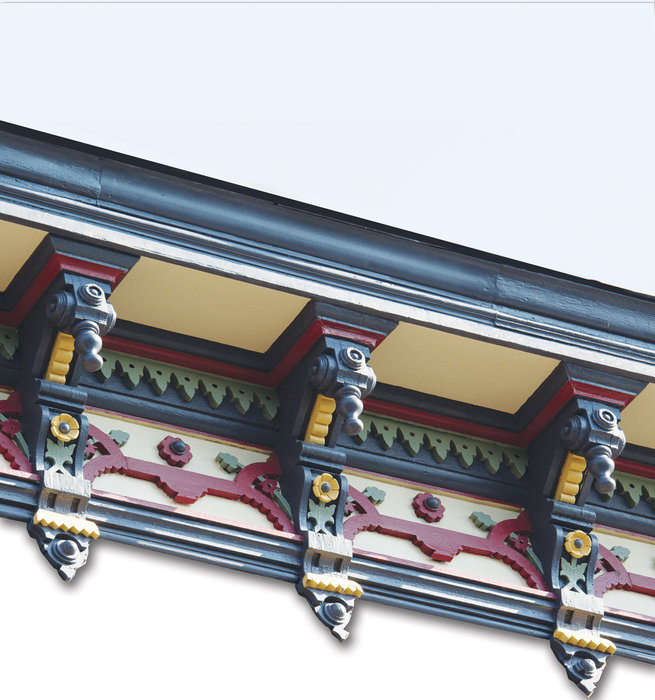
Let’s face it, when birds have flown into your attic through holes in your cornice and nested there, the time has come for some “frontscaping.”
First, a definition: Cornices are those horizontal molded projections that crown a building.
After a few false starts, my wife Linda and I found a masonry contractor, and the resurfacing of our aging brownstone facade began. Then we started on the fun part: designing the paint scheme for our cornice, which has a montage of eclectic mechanical gears, concentric rings, knobs, and flowers.
We’d admired the beautifully painted, ornate wood Victorian houses in San Francisco and Cape May. Many examples can be seen in Painted Ladies: San Francisco’s Resplendent Victorians by Elizabeth Pomada, Michael Larsen, and Morley Baer. The variety of colors and their creative contrasts and hues highlight the talented workmanship of the carpenters, as well as the character and creativity of the homeowners. It’s quite stunning to see house after house in full display.
We are constrained in Hoboken, of course, by the brownstone facade, and our area of creativity is limited to the wood cornice. The cornice reminds me of the tie worn with a suit, the place where you can show some individuality and flair. Although so much finely detailed carpentry on cornices is hidden beneath monolithic blacks, browns, and greens, it doesn’t take much to imagine the streets of Hoboken lined with detailed and colorful cornices.
Multiple examples in town will get your creative juices flowing, and this project is a good excuse for a walking photo tour. Don’t forget to include the kids if you want a big dose of imagination.
Here’s how to create your new and improved painted cornice:
Here’s how to create your own painted cornice
–Shoot a digital picture of your cornice at the highest resolution possible. After uploading it to your computer, you’ll probably notice a repeating pattern. You can enlarge that area with your photo-adjustment software. I used Lightroom by Adobe, but simpler programs will probably suffice.
–Decolorize the photo to black and white.
–Lighten the dark areas because it is hard to color effectively on dark backgrounds. Do this by increasing the exposure of the photo, increasing the fill light, or deceasing the saturation. It is important to retain the outline of the areas to be colored.
–Save this pale rendition of your cornice and print at least ten more copies. Now for the best part, color away! You’ll want a box of colored pencils with 48 to 64 colors. You’ll find it doesn’t take long to generate multiple variations. Try three, four, or five colors. We tried to avoid getting too carried away and ending up with a circus look.
–Go to your paint store and find the matching oil-based, outdoor paint patches and lay them on your photo to double check your color choices, and to help the painter follow your design.
–Find a professional painter. Peter Volaric, for example, is a well-known Hoboken painter.
–Before the painting begins, replace rotten wood, fill in weather cracks, and replace missing pieces.
–Use a primer coat, followed by two low-luster coats. Dry overnight between coats.
Our cornice looks great—and no more birds in the attic!—07030
